There are many sites about making bootable USB pen drives with Ubuntu Linux and most of these sites have the user put the ISO on the thumb drive instead of actually installing a Linux distribution onto the USB flash drive. I like to actually place the whole operating system on a USB flash drive so I always have the full operating system available. Many sites will tell you the ISO install is best but I disagree. Flash drives are much cheaper today and you can split an 8 GB drive into a Linux and a VFAT partition.
I prefer using a virtualizer that offers USB support to do the install. I have used a real PC with data on it while fatigued, entered in the wrong partition, and ended up with a really bad week of restores. Virtualization allows you to only load to the USB drive and keeps your PC protected from accidents. I like to use the virtual machine with no hard drive, which makes the install simpler especially when the USB flash drive is connected before install. You can't mix up partitions or boot areas with only one drive in the virtual machine.
I prefer using a virtualizer that offers USB support to do the install. I have used a real PC with data on it while fatigued, entered in the wrong partition, and ended up with a really bad week of restores. Virtualization allows you to only load to the USB drive and keeps your PC protected from accidents. I like to use the virtual machine with no hard drive, which makes the install simpler especially when the USB flash drive is connected before install. You can't mix up partitions or boot areas with only one drive in the virtual machine.

Virtual Machine Settings Enable USB
USB Thumb Drive Enabled
Begin your install by selecting keyboard type and entering your host name along with other information until you reach the partition screen.
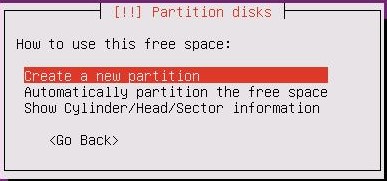
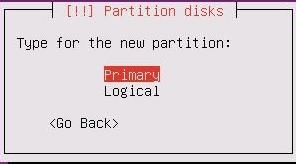
Create a new Partition
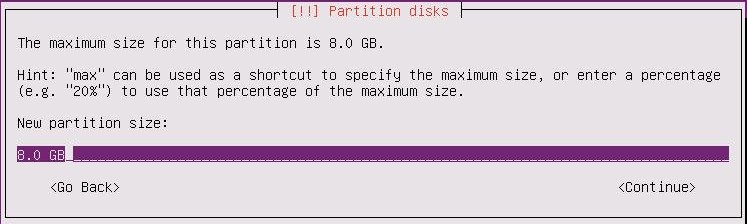
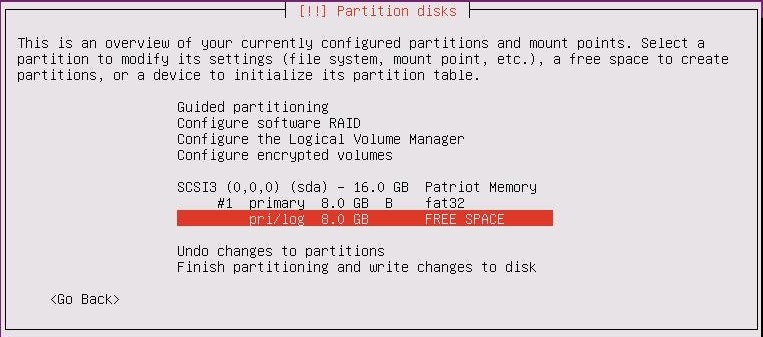
The flash drive used here already had two 8 GB VFAT partitions and I erased the second one and use it for Linux. I usually select the Ubuntu alternate CD and manual partitioning but if you have only one USB drive in your VM, then you can use auto install and the whole flash drive if you won’t need the VFAT for sneaker net with other computers. It is a good time to note the path of your USB thumb drive if you have multiple drives in your system. It is /dev/sda in the virtual machine and typically /dev/sdh on my physical desktop. You might need that for the bootloader install later if you are doing this on a physical machine with multiple disk drives.

Ensure the partition type is primary and bootable then select your filesystem type. I have used ext4 and ext2 succesfully. You may wish to read the benchmarks and to determine your filesystem choice then work on performance later.
Primary Partition for Booting
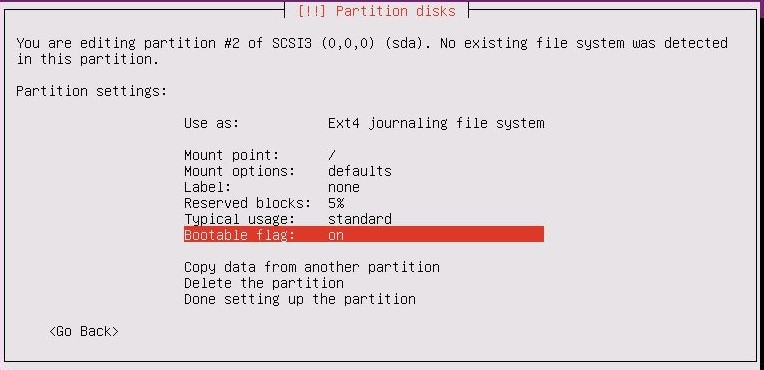
Enable Bootable Flag
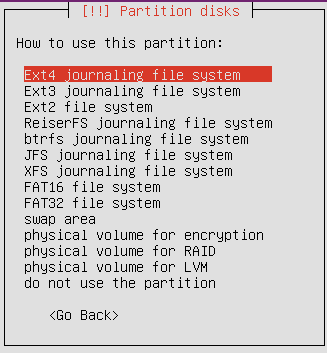
Choose Filesystem Type
Note that I create the system with no swap space since the computers I would boot from typically have 2 GB of ram which tends to be enough for my needs. Also, I use a USB disk drive with 200 ms write speeds but I have found paging to slow the system down. I used to turn off browser caching and the syslog service in the past but I find newer systems perform fine with these on.

No Swap Space
Commit your changes, create the filsystem, and begin the user creation process. I like to encrypt my home directory with the built in ecrypt filesystem which leaves me feeling comfortable should I lose the USB key disk.
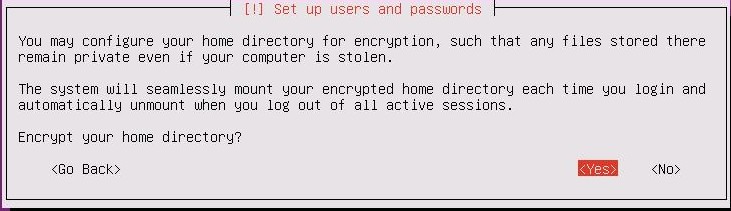
Encrypt Home Directory
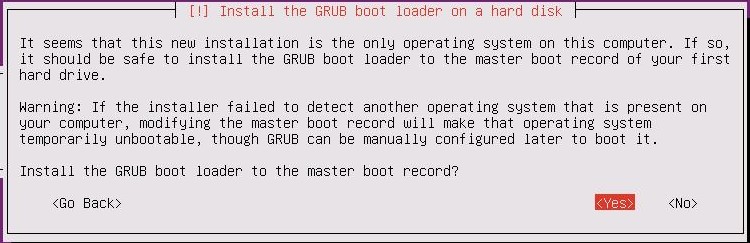
The next step is the one that can be a nuisance should you use a physical PC. If you have only one disk, the Ubuntu installer will place the boot loader on the master boot record of the disk. If you have multiple drives, then select manual and enter the drive name on that page. On my desktop, the drive usually appears as /dev/sdh so I use that for physical installs. You must be careful not to override a bootloader on a machine you are using just for installing to a USB disk drive.
Install GRUB in MBR on Thumb Drive
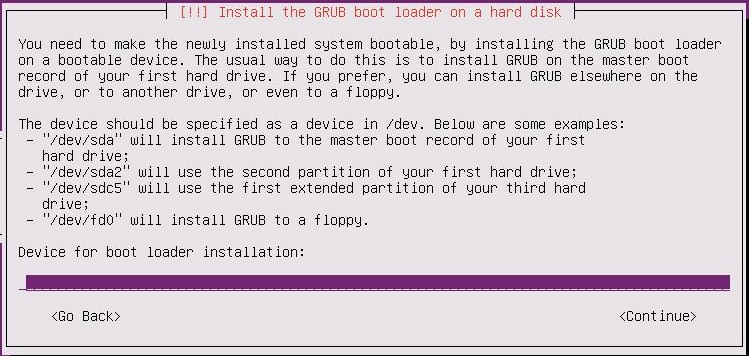
Select Appropriate Flash Drive for MBR
You can see in the picture with the drive booted that I am using a Patriot XT flash drive on /dev/sda running Ubuntu 11.10 Oneirc Ocelot.
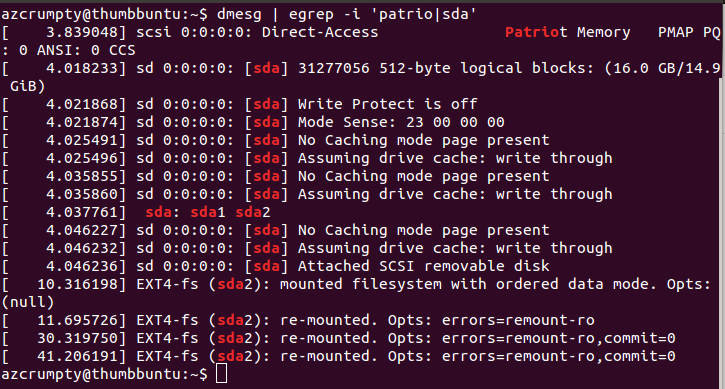
High Speed Write 200 ms Flash Drive
Related articles

 RSS Feed
